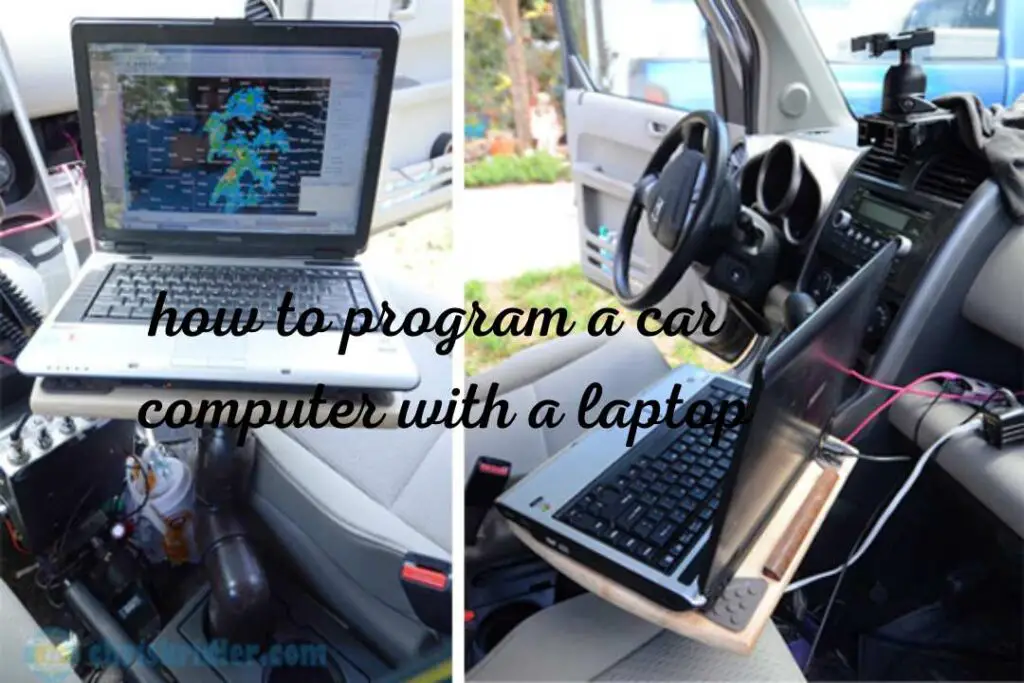
Introduction:how to program a car computer with a laptop

Programming your car’s computer, also known as car tuning or engine tuning, is the process of modifying the software or firmware that controls various aspects of your vehicle’s performance. By reprogramming the car’s computer, you can optimize engine parameters, enhance fuel efficiency, increase horsepower and torque, improve throttle response, and customize various other settings to suit your preferences.
Benefits of Programming Your Car’s Computer
- Performance Optimization: One of the primary benefits of programming your car’s computer is the ability to optimize its performance. By adjusting engine parameters such as air-to-fuel ratio, ignition timing, and turbocharger boost levels, you can achieve significant improvements in horsepower and torque output. This can result in a more exhilarating driving experience and enhanced acceleration.
- Fuel Efficiency Improvement: Car tuning can also lead to improved fuel efficiency. By fine-tuning the engine’s parameters, you can achieve a more efficient combustion process, reducing fuel consumption and maximizing mileage. This can be particularly beneficial for long-distance drivers or those looking to save money on fuel costs.
- Enhanced Throttle Response: Programming your car’s computer allows you to improve throttle response, reducing any lag or delay between pressing the accelerator pedal and the engine’s response. This results in a more immediate and direct power delivery, making the driving experience more engaging and responsive.
- Customization and Personalization: Car tuning provides the opportunity to customize various settings to suit your preferences. This includes adjusting factors such as rev limiters, shift points, idle speed, and even exhaust sound. By tailoring these parameters, you can create a unique driving experience that aligns with your individual style and preferences.
Tools Needed to Get Started
To program your car’s computer, you will need the following tools:
- OBD-II Interface: An On-Board Diagnostics (OBD) interface is essential for connecting your computer or laptop to the car’s computer system. This interface allows you to access and modify the software or firmware. There are various OBD-II interfaces available, ranging from basic ones to more advanced models that offer additional features.
- Diagnostic Software: You will need appropriate diagnostic software compatible with your car’s make and model. The software enables communication with the car’s computer system and provides the interface through which you can modify engine parameters and settings.
- Computer or Laptop: A computer or laptop is necessary to run the diagnostic software and connect to the OBD-II interface. Ensure that your computer meets the system requirements of the diagnostic software you plan to use.
- Knowledge and Expertise: Programming your car’s computer requires a certain level of technical knowledge and expertise. It is important to have a good understanding of engine parameters, their impact on performance, and the potential risks associated with modifying them. Familiarize yourself with the specific procedures and guidelines provided by the diagnostic software and consult
What is a Car Computer?
A car computer, also known as an Electronic Control Unit (ECU) or Engine Control Module (ECM), is an embedded system that manages and controls various aspects of a vehicle’s operation. It is essentially a specialized computer that receives input from sensors throughout the car and uses that information to make decisions and control different systems.
Components of a Car Computer
A car computer consists of several key components:
- Microcontroller or Microprocessor: This is the central processing unit (CPU) of the car computer. It executes instructions and processes data to control various functions.
- Memory: The car computer has different types of memory, including random-access memory (RAM) and read-only memory (ROM). RAM is used for temporary storage of data during operation, while ROM stores permanent information such as the program code and calibration data.
- Input/Output (I/O) Interfaces: These interfaces connect the car computer to various sensors and actuators in the vehicle. They receive input from sensors such as the throttle position sensor, oxygen sensor, crankshaft position sensor, and transmit output signals to control actuators like fuel injectors, ignition coils, and throttle body.
- Communication Interfaces: Car computers often have communication interfaces to facilitate communication with external devices. These interfaces can include Controller Area Network (CAN) buses, which allow the car computer to exchange data with other ECUs in the vehicle, as well as interfaces for diagnostics and programming purposes.
- Power Supply: The car computer requires a stable power supply to operate effectively. It is typically connected to the vehicle’s battery and regulated by voltage regulators.
Role of the Car Computer in Modern Cars
The car computer plays a crucial role in modern cars and is responsible for various functions, including:
- Engine Control: The car computer monitors and controls engine parameters such as fuel injection timing, ignition timing, air-fuel ratio, and turbocharger boost pressure. It ensures optimal engine performance, efficiency, and emission control.
- Transmission Control: In vehicles with automatic transmissions, the car computer manages gear shifting, torque converter lockup, and other transmission functions. It uses input from various sensors to determine the appropriate gear selection and shift points.
- Vehicle Stability and Safety Systems: The car computer is involved in controlling stability systems such as Anti-lock Braking System (ABS), Electronic Stability Control (ESC), Traction Control System (TCS), and other safety features. It continuously monitors vehicle dynamics and applies corrective measures to enhance stability and prevent accidents.
- Climate Control: The car computer manages the heating, ventilation, and air conditioning (HVAC) system, adjusting fan speed, temperature, and airflow based on user settings and sensor inputs.
- Diagnostics and Error Handling: The car computer continuously monitors various systems for faults or malfunctions. It stores diagnostic trouble codes (DTCs) and provides information to technicians for troubleshooting and repairs.
Overall, the car computer serves as the brain of the vehicle, controlling and coordinating numerous systems to ensure optimal performance, efficiency, safety, and comfort.
Choosing the Right Software
When it comes to programming your car’s computer, selecting the right software is crucial. Here is an overview of software options available, along with their pros and cons:
- Manufacturer-Specific Software:
- Overview: Some car manufacturers provide their own software tools specifically designed for programming their vehicles’ ECUs.
- Pros: Manufacturer-specific software often offers comprehensive access to the ECU and specific features tailored to your vehicle. It may provide advanced diagnostic capabilities and support for specialized functions.
- Cons: These software tools can be expensive and may have a steeper learning curve. They are typically limited to a specific car brand, which means they won’t work with other manufacturers’ vehicles.
- Third-Party Diagnostic and Tuning Software:
- Overview: There are several third-party software options available in the market, developed by companies specializing in car diagnostics and tuning.
- Pros: Third-party software is often more affordable than manufacturer-specific tools. It may offer compatibility with multiple vehicle brands, allowing you to work with a broader range of cars. Some third-party software provides extensive tuning capabilities and advanced features.
- Cons: The compatibility of third-party software may vary, and not all systems and ECU models are supported. It’s essential to ensure compatibility with your car’s make, model, and ECU version before purchasing third-party software.
- Open-Source Software:
- Overview: Open-source software, such as TunerPro, FreeEMS, or MegaSquirt, is developed and maintained by a community of enthusiasts and experts.
- Pros: Open-source software is often free or available at a low cost. It offers flexibility and customization options, allowing you to modify the software to meet your specific needs. It can be a great option for learning and experimenting with car tuning.
- Cons: Open-source software may not have the same level of polish, user interface, and support as commercial options. It may have limited documentation and fewer features compared to more established software solutions.
Recommended Software for Beginners
For beginners, a user-friendly software option with good community support is highly recommended. Here are a couple of options that are suitable for beginners:
- TunerStudio:
- Overview: TunerStudio is a popular commercial software designed for tuning vehicles with MegaSquirt ECUs. It offers a user-friendly interface and comprehensive tuning capabilities.
- Pros: TunerStudio provides a straightforward user interface with intuitive controls. It offers real-time data monitoring, extensive tuning parameters, and supports a wide range of MegaSquirt ECUs. It has a large community of users, providing access to helpful resources and support.
- Cons: TunerStudio is primarily focused on MegaSquirt ECUs, so it may not be suitable if you have a different ECU brand.
- RomRaider:
- Overview: RomRaider is an open-source software used for tuning Subaru vehicles equipped with Engine Control Units (ECUs) that are compatible with the OpenPort interface.
- Pros: RomRaider is free and offers a range of tuning features for Subaru ECUs. It has an active community that provides support and shares knowledge. The software allows data logging, ECU flashing, and parameter adjustments.
- Cons: RomRaider is specific to Subaru vehicles and may not be suitable for other car brands.
When starting out, it’s important to research and choose software that is compatible with your specific vehicle’s make, model, and ECU. Additionally, consider factors such as ease of use, available documentation, community support, and your specific tuning goals.
Connecting Your Laptop to Your Car
To connect your laptop to your car’s computer for programming or diagnostics, you need to prepare your laptop, choose the right cables and adapters, and establish the connection. Here’s a step-by-step guide:
- Preparing Your Laptop for the Connection:
a. Install the Software: Ensure that you have installed the appropriate diagnostic or tuning software on your laptop. Follow the software’s installation instructions and ensure it is compatible with your car’s make, model, and ECU.
b. Update Drivers: Update the drivers for any USB or serial ports on your laptop. This ensures proper communication between your laptop and the car’s computer.
c. Charge Your Laptop: Make sure your laptop is sufficiently charged or connected to a power source. A stable power supply is essential to prevent interruptions during the programming or diagnostic process. - Choosing the Right Cables and Adapters:
a. OBD-II Cable: Obtain an OBD-II cable with the appropriate connectors for your car’s OBD-II port. The OBD-II port is usually located under the dashboard, near the steering column. The cable should have one end with the OBD-II connector (16-pin) to connect to the car and the other end with the appropriate connector for your laptop (e.g., USB or serial).
b. Adapters (if necessary): Depending on the connectors on your laptop and the OBD-II cable, you may need additional adapters. For example, if your laptop only has USB ports but the OBD-II cable has a serial connector, you will need a USB-to-serial adapter. - Connecting Your Laptop to Your Car:
a. Locate the OBD-II Port: Find the OBD-II port in your car. It is usually located beneath the dashboard on the driver’s side, but the exact location may vary depending on the car model. Consult your car’s manual for specific guidance.
b. Connect the OBD-II Cable: Plug one end of the OBD-II cable into the OBD-II port of your car. Ensure it is securely connected.
c. Connect to Your Laptop: Connect the other end of the OBD-II cable to your laptop using the appropriate connector or adapter. Again, ensure it is securely connected. - Establishing the Connection:
a. Launch the Software: Open the diagnostic or tuning software on your laptop.
b. Select the Correct Port: In the software, select the appropriate communication port for the connection. The software should provide a list of available ports, and you need to choose the one that corresponds to the OBD-II cable connection.
c. Establish Communication: Initiate the communication between your laptop and the car’s computer using the software. This may involve selecting the appropriate protocol and establishing the connection through the software’s interface.
Once the connection is established, you should be able to access and modify the car’s computer parameters through the software interface on your laptop. Follow the software’s instructions and guidelines for performing programming, diagnostics, or tuning tasks.
Note: It’s essential to follow safety precautions and ensure that you are using reputable software and cables to avoid any potential damage to your car’s computer or electrical systems. Consult the software and hardware documentation for specific instructions and guidelines related to your setup.
Reading Your Car’s Computer
Reading your car’s computer is a crucial step in diagnosing and troubleshooting issues. This involves retrieving diagnostic trouble codes (DTCs) from the car’s computer and interpreting the data to identify potential problems. Here’s a guide on how to read your car’s computer:
- Reading Diagnostic Trouble Codes (DTCs):
a. Launch the Software: Open the diagnostic software on your laptop that is compatible with your car’s make, model, and ECU.
b. Connect to the Car: Connect your laptop to your car’s computer using the appropriate cables and adapters, as described in the previous section.
c. Access the Diagnostic Menu: In the software, navigate to the diagnostic menu or function that allows you to read DTCs. This may be labeled as “Read Codes,” “Diagnostics,” or similar.
d. Scan for DTCs: Initiate the scanning process through the software. It will communicate with the car’s computer and retrieve the stored DTCs.
e. View the DTCs: Once the scan is complete, the software will display a list of DTCs associated with specific systems or components in your vehicle. - Interpreting the Data:
a. DTC Code Interpretation: Each DTC consists of a unique code, such as P0300 or C1234. Consult the software’s built-in database, documentation, or online resources to interpret the codes. The codes provide information about the specific system or component that triggered the fault.
b. DTC Description: The software should provide a description or explanation of the DTC. This description helps you understand the nature of the problem.
c. Severity and Cause: The DTC information may indicate the severity level of the issue (e.g., “critical” or “minor”) and potential causes of the problem. It provides insights into the possible faults or malfunctions affecting your vehicle. - Troubleshooting Common Issues:
a. Research and Resources: Use reputable sources, such as repair manuals, online forums, or technical databases, to find detailed information about the specific DTCs you have retrieved. These resources can provide troubleshooting steps, common causes, and recommended solutions.
b. Systematic Approach: Take a systematic approach to diagnose and address the issue. This may involve performing visual inspections, conducting tests using specialized tools or sensors, or following step-by-step diagnostic procedures outlined in repair manuals.
c. Addressing the Root Cause: Once you have identified the problem related to the DTC, address the root cause of the issue. This may involve repairing or replacing faulty components, adjusting settings, or performing other necessary maintenance or repairs.
d. Clearing DTCs: After addressing the issue, you can clear the DTCs from the car’s computer using the diagnostic software. This is typically done through an option like “Clear Codes” or “Reset ECU.” Clearing the DTCs ensures that any resolved issues are no longer flagged as faults.
It’s important to note that while reading DTCs can provide valuable information for troubleshooting, it may not always provide a definitive diagnosis. Complex issues may require additional diagnostics or the expertise of a qualified mechanic.
Always follow safety precautions and guidelines provided by the diagnostic software and consult professional assistance or repair manuals when needed.
VI. Programming Your Car’s Computer
Programming your car’s computer involves the process of modifying the software code to change its behavior or add new features. Here’s an overview of the programming process, along with tips for avoiding common mistakes:
- Understanding the Programming Process:
a. Research and Familiarize: Understand the programming capabilities and limitations of your car’s computer. Read the documentation, user manuals, or online resources related to your car’s make, model, and ECU. This will give you a better understanding of the programming process and the specific tools or software required.
b. Writing Code: Depending on the programming method, you may need to write code in a specific programming language such as C or assembly language. Alternatively, you may use specialized software that provides a graphical interface for modifying parameters or selecting predefined options.
c. Uploading the Code: Once you have written or modified the code, you will need to upload it to the car’s computer. This is typically done using a programming tool or software that communicates with the ECU through a wired or wireless connection. - Tips for Avoiding Common Mistakes:
a. Backup Original Code: Before making any changes, create a backup of the original code. This ensures that you can revert to the original settings if something goes wrong during the programming process.
b. Understand the Impact: Thoroughly understand the potential consequences of your programming changes. Changing critical parameters without proper knowledge can lead to serious issues or damage to your car’s systems.
c. Follow Documentation: Carefully follow the instructions provided by the manufacturer or programming software. This includes the recommended procedures, software settings, and safety precautions.
d. Test Incrementally: If you are making significant changes, it’s advisable to test and verify your modifications incrementally. This allows you to identify and address any issues or unintended consequences in a controlled manner.
Post you might like:
Asus vs Lenovo
5 Cheapest Laptop for Cricut Design Space in 2023
5 Best Gaming Laptop for Warzone in 2023
VII. Testing Your Changes
Testing your programming changes is crucial to ensure their effectiveness and safety. Here are some important considerations for testing your changes:
- The Importance of Testing:
a. Verify Functionality: Test whether the new code performs as intended and achieves the desired results. This includes checking for any errors, glitches, or malfunctions that may have been introduced during the programming process.
b. Ensure Compatibility: Test the compatibility of your programming changes with the car’s existing systems and components. Ensure that all functions, sensors, and modules continue to operate properly after the modifications.
c. Performance Evaluation: Assess the impact of your programming changes on the car’s performance, such as engine power, fuel efficiency, or handling. Compare the results with your expectations and make adjustments if necessary. - How to Test Your Changes Safely:
a. Controlled Environment: Perform tests in a safe and controlled environment, such as an empty parking lot or a closed circuit, away from traffic or pedestrians.
b. Diagnostic Tools: Use appropriate diagnostic tools to monitor and record relevant data during the testing process. This allows you to analyze the performance and behavior of the car before and after the programming changes.
c. Systematic Approach: Follow a systematic approach during testing. Start with basic functionality tests, then gradually move to more complex scenarios or performance evaluations.
d. Safety Precautions: Take necessary safety precautions during testing, such as wearing protective gear, ensuring proper ventilation, and avoiding high-risk maneuvers or excessive speed. - Common Testing Scenarios:
a. Engine Performance: Evaluate the impact of your programming changes on engine power, torque, throttle response, and overall performance. Monitor parameters such as RPM, fuel consumption, and exhaust emissions.
b. Sensor Calibration: Verify the accuracy and responsiveness of sensors affected by the programming changes. This includes sensors for temperature, pressure, airflow, and other vital
Conclusion
In conclusion, programming your car’s computer can offer significant benefits, such as customization, improved performance, and enhanced functionality. Here’s a summary of the key points discussed:
- Programming Process: Understand the programming process by researching and familiarizing yourself with your car’s computer and the required tools or software.
- Writing and Uploading Code: Write or modify the code according to your programming goals and upload it to the car’s computer using appropriate programming tools or software.
- Tips for Avoiding Mistakes: Take precautions by backing up the original code, understanding the impact of your changes, following documentation and instructions, and testing incrementally to avoid common mistakes.
- Importance of Testing: Testing is crucial to verify the functionality, compatibility, and performance of your programming changes.
- Safe Testing: Conduct tests in a controlled environment, use diagnostic tools to monitor data, follow a systematic approach, and prioritize safety precautions.
In conclusion, programming your car’s computer can be a rewarding endeavor if approached with proper knowledge, caution, and testing. It is essential to have a thorough understanding of your car’s systems and to follow manufacturer guidelines and recommended procedures.
If you are unsure or lack experience, it is advisable to seek professional assistance or consult knowledgeable experts in the field. They can provide valuable guidance, prevent potential risks, and ensure optimal results.
Always prioritize safety, research, and careful planning when modifying your car’s computer. By doing so, you can unlock the full potential of your vehicle and tailor its performance to your preferences while maintaining reliability and safety.